Once a daily activity in the lives of most American families, the act of baking bread has nearly vanished from our culture. Fresh-baked, whole-grain bread is something that we’re far more likely to enjoy at a restaurant than in our own homes. This is truly a shame because the act of baking and eating fresh bread is a physically healthy and wholesome activity. But it’s not just that. It’s also something that fosters mental and spiritual health by slowing us down and reconnecting us to something very basic and enjoyable.
Making bread has always fascinated me. It combines the art of baking with the science of microbiology and throws in a little random variation and chaos along with some wonderfully tactile sensations in the form of aromas and touch to give a product that is at once incredibly delicious and remarkably nutritious.
The recipe I use is one that has been adapted over time. It makes two free-form, or “hearth” loaves (not baked in a bread pan.) It uses 100% organic whole wheat bread flour and includes some ground flax seed and cracked wheat to amp up the nutrient level a bit. There’s one thing you need to get used to if you’re going to make bread: it’s never the same experience twice. Unlike cakes or even quickbreads where the ingredient measurements are crucial, the amount of flour you use varies each time depending on the moisture level of your flour and even the humidity level in your home.
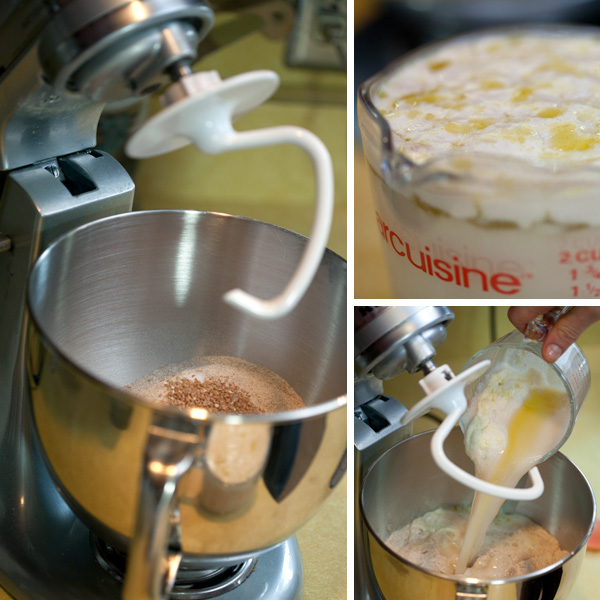
The process starts by “proofing” the yeast. The powdered yeast is mixed with warm (not hot) water, honey and oil and then allowed to sit for 5-10 minutes until a frothy head develops on the surface. This process wakes up the yeast and ensures you have active, robust yeast ready to raise your loaves high with a delightful yeasty flavor. If your yeast doesn’t develop the frothy head, it’s time to replace it. Here’s a tip for measuring the honey: measure your oil first then immediately measure the honey. The honey will slip right off the oiled measuring spoon speeding up the process and making sure you get an accurate measurement.
This recipe calls for the use of a KitchenAid stand mixer. While a good loaf can be made kneading by hand, there is simply no better way to efficiently make bread than to use a stand mixer. You can knead two loaves worth of dough in 20 minutes using a KitchenAid. This would take 40-45 minutes by hand.
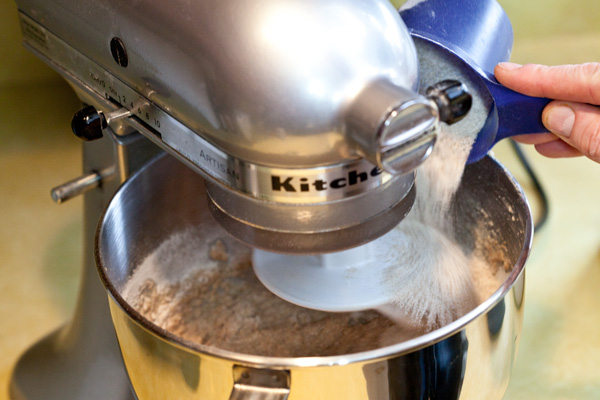
After the yeast has been proofed, it is mixed with half the flour, ground flax seed, cracked wheat and salt in the mixing bowl. Bit by bit, more flour is added until a dough ball is formed. This dough ball should be firm but still somewhat sticky and the amount of whole wheat flour needed to get to this point will vary from batch to batch. This is where experience comes into play, too. You want the dough to be slightly moist so that the final cooked loaves are not too dry but you also want uncooked loaves that are firm enough that when they rise, they rise UP instead of OUT. Dough that is too moist will be so soft that it simply spreads out instead of rising vertically.
Once all of the flour is in, the dough is kneaded for 20 minutes. The process of kneading is so crucial that it could warrant a blog entry all of its own. Inside the flour is a stringy protein called gluten. Kneading stretches and entangles these strings which is known as “developing the gluten”. This is what gives good bread it’s chewy consistency. It enhances flavor and it gives high-rising loaves. Well-kneaded bread will keep longer before getting stale than inadequately-kneaded bread, as well.
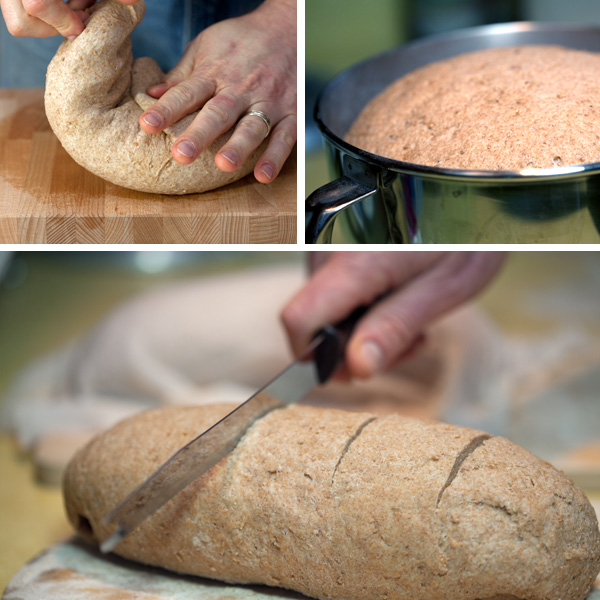
Through the kneading process, the dough transforms from a slightly sticky, lumpy mass to a smooth, elastic ball. It smells good. It feels like flesh, maybe a breast or a butt cheek. The final kneaded dough ball will have a smooth gluten “skin” and it is important to preserve this skin to give your bread a good crust. Once it is formed, do not tear it or cut it. The dough ball is placed into an oiled bowl, covered with plastic wrap or a wet towel, and allowed to rise until doubled, usually about an hour.
The loaves I make are only allowed to rise once before being formed into loaves. Optionally, you can punch the loaf down and allow it to rise again to give a more yeasty flavor with a tighter crumb (smaller air holes.) At any rate, once it is fully risen, gently punch the dough down to expel the trapped gases. The dough should be lightly kneaded, always being careful to preserve the gluten skin. Let the ball sit for 4-5 minutes then lightly press it out flat then pinch it in the middle to form two separate pieces. Form these into loaves, place on a well-floured cutting board or oven peel, cover with damp paper towels and allow to double in size. If you are going to bake the loaves in bread pans, place them into oiled bread pans dusted with cornmeal or whole wheat flour. About 10-15 minutes into the rise, cut four ½-inch deep slits across the loaves. These slits allow the loaf to rise without tearing the gluten skin. You will see the slits fill in as the dough expands. The entire rise will take around 45 minutes.
While the bread is rising, preheat the oven to 425°F. To make hearth loaves, you will need a baking stone (I use the FibraMent-D) and the stone needs to be preheated fully before the loaves are placed on it. The best bread-making ovens are brick-lined and have misters in them to keep humidity levels high. I simulate this by putting a cast iron pan in the bottom while the oven is preheating and periodically tossing in a cupful of water while the bread bakes. It’s very dramatic.
When the loaves have risen, use a brush to brush them with water to moisten the outside, turn the oven down to 375°F, and then place the loaves in the oven.
As the bread bakes, the house begins to fill with one of the most wonderful aromas on the planet. There’s something about the smell of freshly baking bread that takes you to a different plane. It’s the smell of warmth, of safety, of family. It spells the word “cozy” in your nose. It’s the aroma version of a down blanket wrapped around you on a chilly day. It’s an olfactory hug. It takes the concept of comfort food to a whole new level; the original aromatherapy.
Bake for 35 minutes or so, until the loaves are very lightly browned and sound hollow when you tap the bottom. Remove them from the oven, place on a cooling rack and wrap with towels. If you want a softer crust, brush the loaves lightly with butter before cooling. Do not slice the loaves until they are fully cooled to maintain a moist crumb.
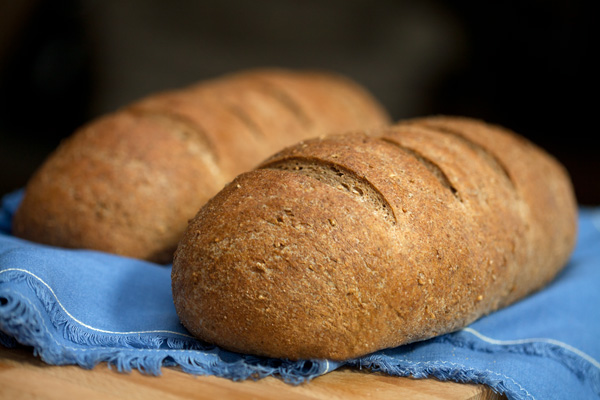
The end result of this process are two loaves of some of the finest tasting bread you’ll ever eat. It’s soft and yeasty. It’s good for sandwiches. It’s good for toast. It’s good with cheese and fruit and wine. And, most of all, it’s good for you. One loaf has around 48 grams of protein and nearly 30 grams of dietary fiber with very little fat. It will keep you regular and cleanse your digestive tract. The health benefits of whole-grain foods are truly remarkable:
- They help to prevent coronary heart disease and strokes
- Whole-grains reduce the risk of cancer, diabetes, obesity, and other chronic diseases
- Whole-grains are an important dietary source of antioxidants
- They help keep cholesterol levels under control
- They bolster the immune system
But besides all of these wonderful nutritional benefits, making whole-grain bread is simply good for your soul. It connects you to something very simple yet very profound. Laurel Robertson, in her book The Laurel’s Kitchen Bread Book, puts it like this:
I would add, finally, that our profound attachment to whole-grains has also to do with a feeling that has deepened steadily over many years’ experience as bakers and eaters of these splendid foods, and which can only be called, at the risk of sounding somewhat balmy, reverence.
There it sits — a single kernel of wheat, maybe three sixteenths of an inch long, creased along one side and rounded on the other. At the bottom nestles a tiny oval compartment, the minute beginning of the plant’s rebirth, called the germ. Above the germ is the endosperm, a protein- and calorie-rich food reservoir that will fuel the plant as it germinates. Enveloping both is a hard seed coat, impermeable for decades to anything but the warmth and moisture that will bring the seed to life.
What’s so marvelous about this simple structure is that everything that helps the grain preserve and reproduce itself also suits the needs of human beings and animals superbly well…
There are those who can look at this kind of arrangement and keep their wits about them. There are others who can’t conceive of it as anything but a sure, small sign of some larger benevolence, hidden deep within the appearance of things — and who feel, too, that nothing could be more fitting in response than to summon up all that is skilled and artful in themselves to bake a fine, high-rising loaf of uncompromising whole-grain bread.
This recipe can be downloaded as a printable .pdf file HERE.


hey chris – do you think you could post some suggestions or advice on how we may adapt your bread recipe for a bread machine?
Hmmm…
Step 1: Unplug bread machine and sell on Ebay or Craigslist.
Step 2: Use the proceeds from the bread machine sale to purchase a KitchenAid or similar stand mixer if you don’t already have one.
Step 3: Print out our recipe and follow the instructions.
(kidding)
I’ll see what I can do. I have honestly never used a bread machine so I am not at all familiar with them. My biggest concern is that the amount of flour you need for “a perfect loaf” varies as I mention in the article. Since a bread machine can’t account for that, the chances of a really good loaf are diminished. I’ll do some research, though, and if I find something, I’ll update the entry.
Hmmm….I think I know what I’m making during week 2 of spring break.
Can I leave out the flax seed and cracked wheat? I do not have either one. I due have a Wondermill to grind my own flour. I have soft white wheat, hard white wheat and hard red wheat berries. Sometimes it requires more moisture, so baking on days like today that are rather humid are and advantage sometimes.
Hi Chris, sounds great. Do you know if this would work with Agave syrup as well? I want to bake the bread for my baby – but no honey until he is older than 1.
Agave syrup can be used as a one for one replacement. I can’t say how the taste will be impacted having never tried it, however.
Hi, do I use the doe hook to mix everything together in my kitchen aid mixer? When all the flour has been added and I feel consistency is correct; you say knead for 20mins, do you mean by hand or will I put y in the KA and use the die hook for 20mins and what speed etc? when all the flour has been added and
Still no response to letting the KA doing the 20 mins of kneading?
Sorry, I missed this. When I am making the bread, I put half the flour and all of the other dry ingredients into the KitchenAide bowl and mix them up Then I add the yeast/water mixture and mix until it’s uniform (I usually give it an assist by scraping the sides a bit with a rubber spatula.) Then I add the rest of the flour in 1/2 cup increments. Once I have the consistency I want, I continue kneading in the KitchenAide. 20 minutes may be a bit too much. I am finding that with better quality flour, 15 minutes is sufficient. I use the dough hook and speed setting #2 for all of this.
Hi, I was concerned on the time of kneading recommended by kitchen aid artisan 5 quart suggests not more than 5 minutes and here the recipe calls for 20 minutes. I am about to buy this mixer.
A five-quart Kitchen Aid won’t be able to handle a two-loaf batch, I don’t think. I would split this recipe into halves for that size. Then I would knead 8-10 minutes for 100% whole wheat, 5-8 minutes for 1/2 and 1/2 whole wheat and white. For a full two-loaf recipe, 20 minutes may be a bit long, particularly if you’re using a high quality flour like King Arthur. For 100% whole wheat, 15 minutes is probably enough.
Whole wheat bread requires more kneading than white bread. For a two-loaf, 1/2 and 1/2 white and wheat batch, I knead 10 minutes.
Which mixer are you using? In the picture above seems to me to be artisan.
Any recommendations on which mixer as I want to moreover make multigrain bread.
Thank you.